
You likely know by now that it is important to embed your fonts in your document when you are sending it to a professional printer. Regardless of the software you are using, this is an important step to take as it ensures your printer has the correct fonts referenced in your document. That being said, this process will look a little different depending on the software you are designing with. Some softwares may have restrictions, or multiple ways of embedding fonts. Here we are going to cover how to embed fonts in Adobe InDesign in PDF and EPS format.
What is embedding?
First things first, embedding fonts is a surefire way to ensure your document is viewed accurately on any device. Embedding fonts in InDesign allows you to convert your text into a PDF file or an EPS, also known as an Encapsulated PostScript file. PDFs are more common, but EPS files are beneficial in their own way as certain programs may only allow for EPS files. You’ll want to embed your fonts regardless of your file type.

Why you should embed your fonts
Embedding fonts into your document for print, regardless of the file type, will ensure that your final printed product accurately reflects your design. Not all computers and printers have the same fonts on them, especially if you download a special font to use. In the case that the printer does not have your font and you did not embed them, it will substitute your fonts with a similar one, but that will likely change the look of your design. It may be a barely noticeable change, or it could largely impact your entire design. To avoid this problem all together, you always want to make sure you embed your fonts into your final file.
How to embed fonts in InDesign – PDF
1. Make sure your InDesign file is open.
2. Select File and select Adobe PDF Presets. This will allow you to choose the resolution quality and size of your PDF file. High Quality Print will give you the highest quality and largest size. Smallest File Size will give you the lowest quality and smallest size.

3. Select where your file will be exported to and click Save. This will prompt the Export Adobe PDF dialog box.
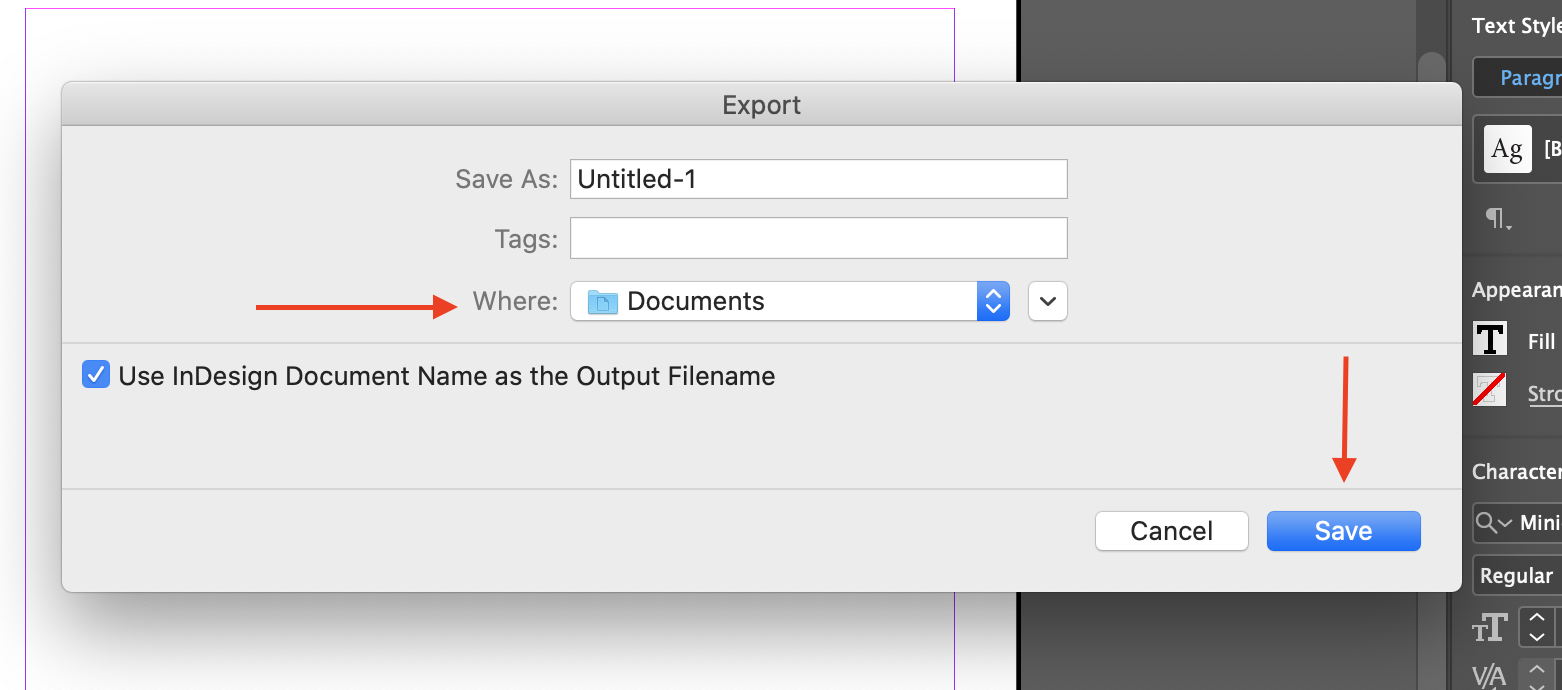
4. In the dialog box, select Advanced. You will be able to choose to embed all of your fonts or just a subset of the fonts.
- To embed all fonts, enter 0% in Subset Fonts When Percent of Characters Used is Less Than.
- To embed only a subset of fonts, enter a higher percentage.
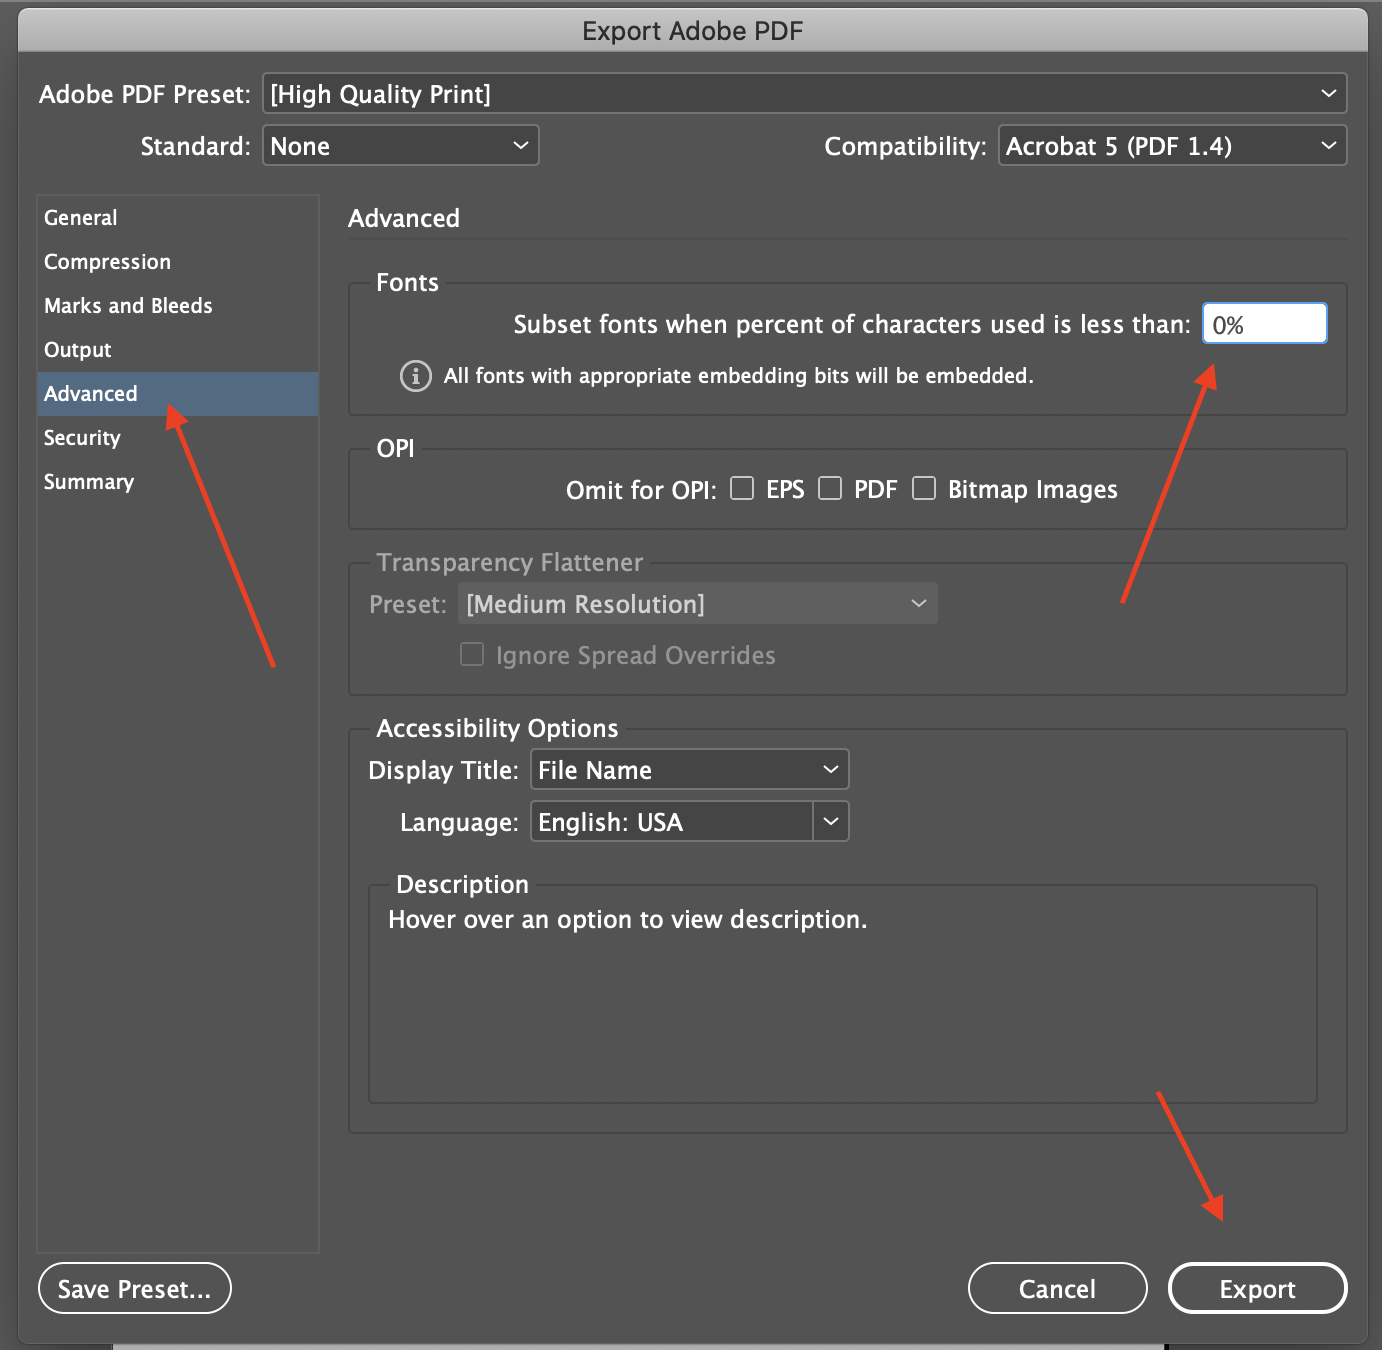
5. Lastly, select Export. The export process may take a few moments depending on the resolution quality.
How to embed fonts in InDesign – EPS
1. If you have not already, open your InDesign file.
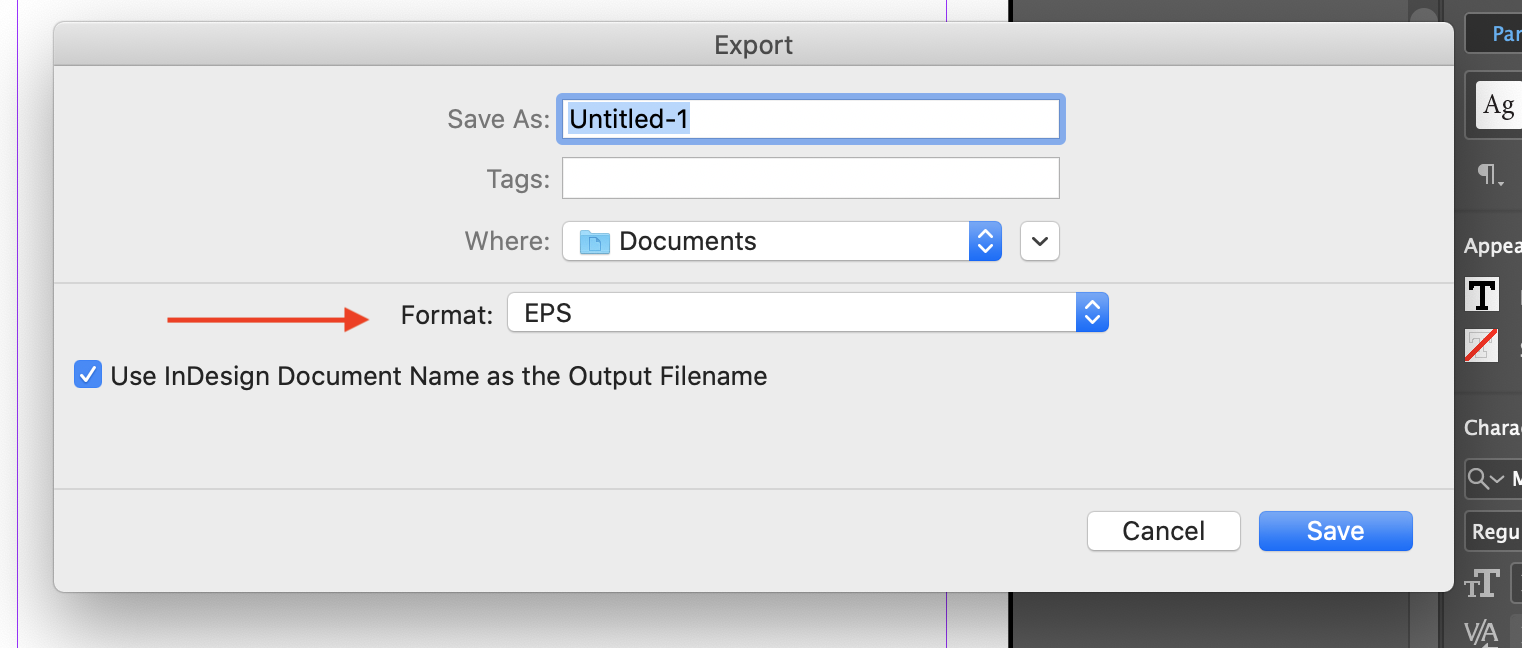
2. Select File then Export

3. Select where you want your file to be exported, then under Format, select EPS and hit Save. This will open the Export EPS dialog box.
4. Similar to the process you followed for a PDF file, you can choose to embed all of your fonts or just a subset. To embed a subset amount, select Subset.
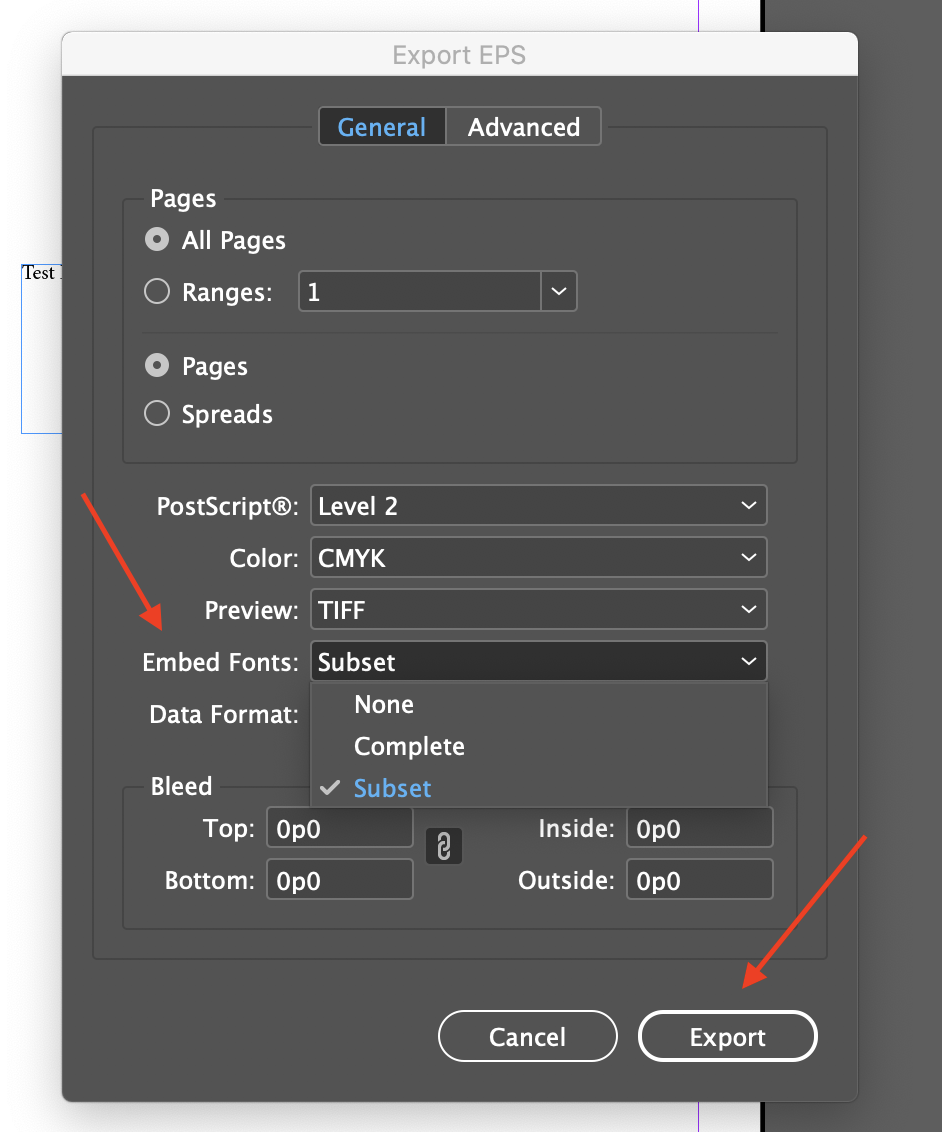
5. Lastly, select Export to complete the process.
Things to keep in mind
You can only embed “TrueType” or “OpenType” fonts in InDesign files. If you have “TypeOne” fonts in your document, they will not embed. If you try to embed a “TypeOne” font your document will not look as intended after exporting.
You can check your font type by selecting the Type drop down menu and choose Find Font. A new window will pop up that displays the fonts currently used in the document. You can select a font and click More Info to display additional information, such as the type. Check under Type to make sure you are using a font that can be embedded in InDesign.
Learn how to embed fonts in a PDF.
Saving a print ready file
On top of embedding your fonts into your file, you’ll want to make sure you save your file in PDF format if possible, this is the preferred file format for printing, at a resolution of 300 DPI and in the color space CMYK. Taking these steps will help keep the printing process as smooth as possible, resulting in a final product that accurately reflects your design.
Questions about your design or file?
If you have any questions about your design or your file, Printivity has design experts on hand to help throughout the process.
Ready to print?
So you have successfully embedded your fonts and now you are ready to send your file off to the printer? You can contact Printivity at 1-877-649-5463 with any questions you may have about the process, or to get started with your order!


